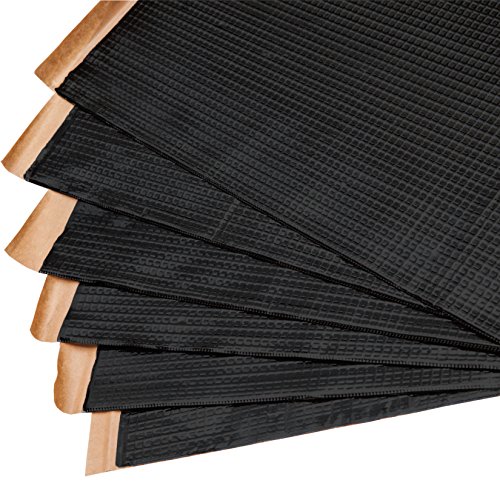
Noico Black 80 Mil X 36 Sq Ft Self-adhesive Foil & Butyl Sound Deadening Under Carpet and Mat, Replace Oem, Automotive Audio Deadener & Dampening Insulation for Cars & Trucks
Price:
$60.30
- Best price for automotive butyl and foil sound deadening of 80 mils on Amazon! Noico just 80 mil $ 1.67 per 1 sqft! Not only you buy an excellent quality product but also will save more than 20 % comparing to Gtmat, 3M and Fatmat! And of course, it is more cost-effective solution than sound deadening Dynamat, Hushmat and Stinger Road Kill!
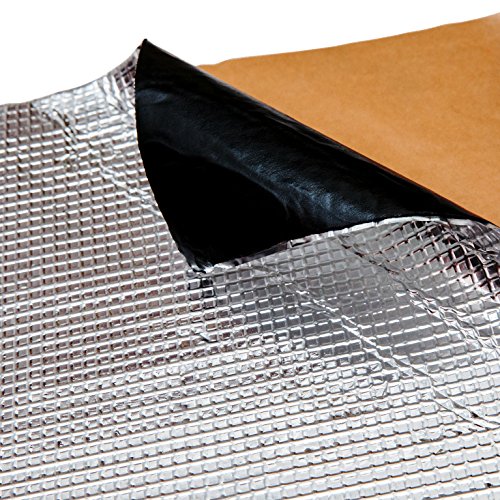
- Car adhesive insulation basically comprises butyl. Sound deadening Noico has a total weight of 0.65 lbs / 1 sq ft. This weight ensures maximum efficiency and sound insulation, which can give the material thickness of 80 mil. Easy to use!
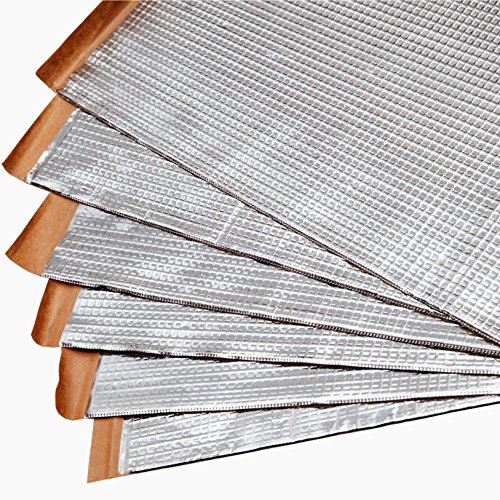
- Audio insulation Noico has a special indicator of the quality of stickiness. The special embossing on the foil must be rolled out while installing, then you'll be 100% sure that the insulation is installed correctly and professionally ! The sound dampening material comes in sheets - which is convenient for installation and cutting!
- Sound deadener material Noico 80 mil manufactured specifically for professional audio installation of your car. Noico 80 mil actively used by competitors in car audio in Europe, Asia, Australia! Noico 80 mil struggling with noise in the car is 1.5 times better in comparison with Noico 50 mil! Vibro dampening material will improve the sound standard audio system (feel the difference your sound speakers and a subwoofer). Noico to some extent is a thermal insulator and can contribute to a more comfortable stay in the car - both in heat and cold.
- Specifications sound deadening material: Thickness 80 mil; Total coverage area of 36 sq.feet; Number of sheets in the stack 9; Sheet Size 29x20 inch. Roll not included. Installation recommendations: 1) Study on the Internet how to easy to disassemble door panels, as well hood liner of the vehicle (it is important that you do not break or damage spoil your car). 2) Once you have sorted out your car, remove the remnants of the factory sound insulation. 3) Thoroughly clean and degrease the area of treatment! Surface must be clean! You can install material on not well cleaned surface, but in the future may have problems such as corrosion. 4) Measure the treated area. We recommend that you make a paper pattern ( layout of the right size ) , and then transfer it onto a sheet of sound insulation. 5) Carefully cut a piece of the desired sound insulation. 6) Without removing the adhesive paper try on a piece to the desired location. 7) Only then remove the protective paper. 8) Then attach the material to the right place, stick it carefully and go over with the roller, to the point where the foil is smooth and embossing is not visible. Also make sure there are no air bubbles under the material. 9) If it's cold weather, slight heating of the material will make your work more enjoyable and comfortable. 10) You can also handle the edges and joints of the material - aluminum tape for sound insulation. 11) Carefully put your car back together. Congratulations! You did soundproofing your car properly! * Installation require temperature above 53F
-
 Noico 80 Mil X 36 Sq Ft Self-adhesive Foil & Butyl Mat Audio Deadening and Sound Dampening Automotive Insulation (Sound deadener For Cars & Trucks)
71.0060.30 -
 Noico 80 Mil X 18 Sq Ft Self-adhesive Foil & Butyl Mat Audio Deadening and Sound Dampening Automotive Insulation (Sound Deadener for Cars & Trucks)
39.0035.10 -
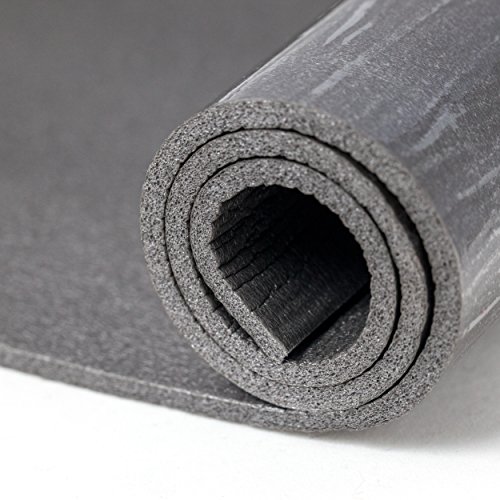 Noico Liner 37.5 Sqft Heat & Cool Automotive Insulation Pad, Foam Self-adhesive Sound Deadening and Dampening Mat for Cars & Trucks (1/6'' or 157 Mil Sound Deadener)
55.000 -
 FatMat 25 Sq Ft x 80 mil Thick Self-Adhesive RattleTrap Sound Deadener Bulk Pack w/Install Kit
69.9962.99


, Navy, Large")


")


")


")


")

